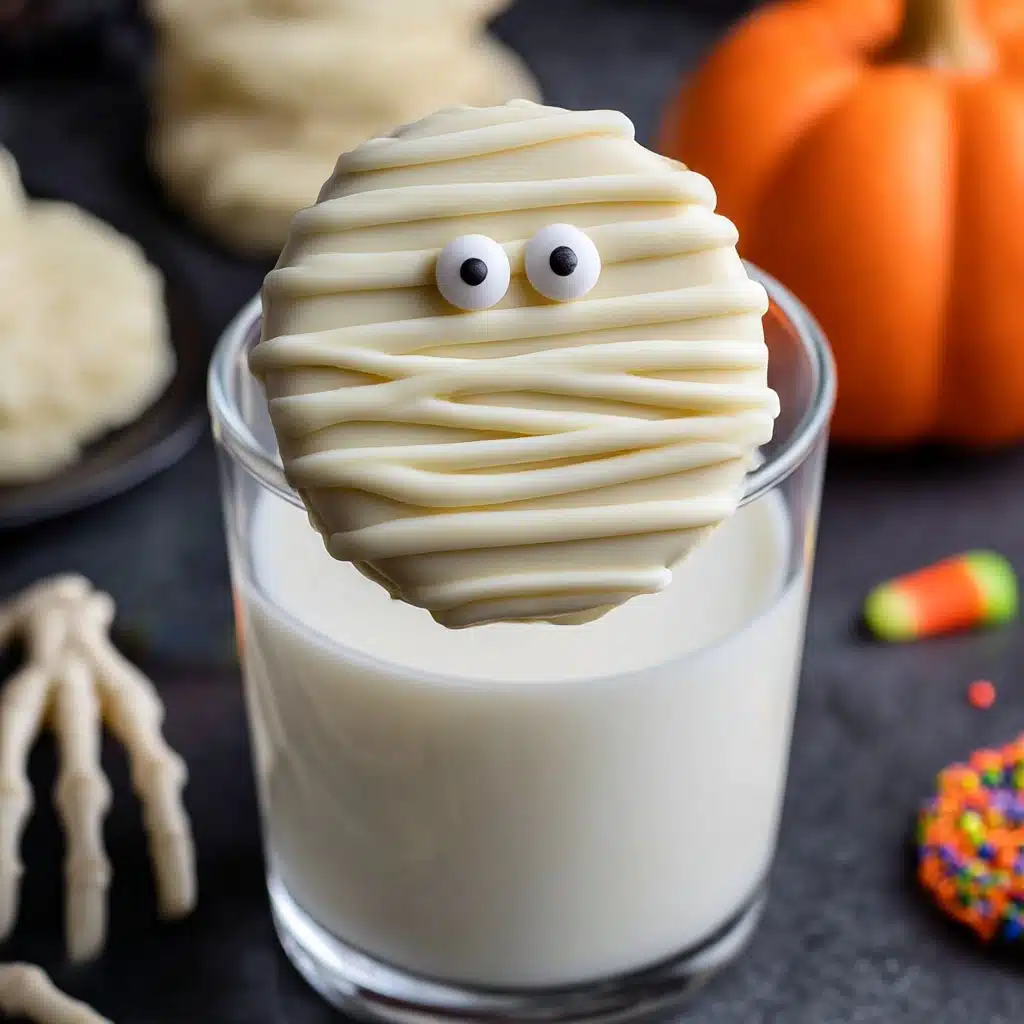
Easy Spooky Chocolate Covered Halloween Dipped Oreos Recipe
If you’re looking to add a dash of festive fun to your Halloween celebrations, you simply cannot miss out on these Easy Spooky Chocolate Covered Halloween Dipped Oreos. They combine the classic indulgence of Oreos with vibrant, festive colors and whimsical decorations that capture the playful spirit of the season. Whether you’re hosting a party, filling a treat bag, or just craving a sweet seasonal snack, this recipe is delightfully simple yet irresistibly impressive—bringing a bit of spooky charm to every bite.

Ingredients You’ll Need
Gathering your ingredients for these Easy Spooky Chocolate Covered Halloween Dipped Oreos is a breeze, and each one plays a crucial role in making these treats taste and look spectacular. From the creamy cookie centers to the colorful candy melts, every element adds to the fun and flavor.
- Halloween Oreos or any sandwich cookie: The perfect base with a crisp chocolate cookie and creamy filling that pairs beautifully with candy melts.
- 6 oz chocolate melting wafers: These create a rich classic chocolate coating that’s smooth and glossy.
- 6 oz orange candy melting wafers: Essential for that iconic Halloween orange hue with a sweet vanilla flavor.
- 8 oz white candy melting wafers: The blank canvas that turns into spooky ghosts or mummy wraps with ease.
- 6 oz purple candy melting wafers: Adds a mysterious, vibrant color that’s perfect for Halloween vibes.
- Sprinkles and candy eyes: They bring the decorations to life and inject personality into each cookie.
How to Make Easy Spooky Chocolate Covered Halloween Dipped Oreos
Step 1: Prepare Your Workspace
Start by lining a cookie sheet with wax paper or parchment paper. This is a simple step that will save you a lot of mess and make cleanup a cinch. Having your setup ready before melting the candy ensures a smooth workflow.
Step 2: Melt the Candy Wafers
Heat your candy melts in a microwave-safe bowl in 30-second increments, stirring in between until smooth—about 1 minute per color. Keeping your candy melts separate by color helps maintain those vivid Halloween hues. Remember, it’s best not to melt more than 6 ounces at a time to avoid seizing or burning.
Step 3: Dip the Oreos
Using a spoon, fully coat one Oreo at a time in the melted candy, making sure it’s evenly covered. Then, lift it out with a fork and gently tap off excess coating. This method keeps your cookies from getting soggy and helps the candy set evenly.
Step 4: Decorate Immediately
Place the dipped Oreo on your prepared cookie sheet and quickly add sprinkles or candy eyes while the coating is still wet so they stick perfectly. This is where your creativity shines—decorate them as spooky or as cute as you like!
Step 5: Let Them Harden
Allow the coated Oreos to set and harden at room temperature for about an hour. Once firm, you can get out your piping bags with a small tip to add detailed mummy designs or spider webs with leftover melts, taking these treats to the next level.
How to Serve Easy Spooky Chocolate Covered Halloween Dipped Oreos
Garnishes
Sprinkles and candy eyes are the classic go-to garnishes for these Easy Spooky Chocolate Covered Halloween Dipped Oreos. You can mix in edible glitter or Halloween-themed sugar crystals to elevate the spooky look and add a delightful crunch.
Side Dishes
Serve alongside warm apple cider or pumpkin spice latte to amplify the fall feeling. For a light savory counterpoint, consider some salted nuts or cheese and crackers to balance the sweetness.
Creative Ways to Present
Arrange these dipped Oreos on a tiered dessert stand surrounded by miniature pumpkins and faux cobwebs for a killer Halloween display. Wrapping each cookie in clear cellophane bags tied with orange and black ribbons also makes a fantastic take-home treat.
Make Ahead and Storage
Storing Leftovers
You can keep any leftover Easy Spooky Chocolate Covered Halloween Dipped Oreos fresh by storing them in an airtight container at room temperature for up to two weeks. This helps maintain their crunchy texture and bright colors without the risk of melting or getting soggy.
Freezing
If you want to enjoy these treats later, they freeze wonderfully for up to two months. Just place them in a freezer-safe container separated by parchment paper and thaw at room temperature before serving.
Reheating
There’s no need to reheat these Oreos; they’re best enjoyed cold or at room temperature so the chocolate coating stays firm and the crispiness of the cookie remains intact. If you want a softer experience, let them sit in a warm room for a few minutes.
FAQs
Can I use regular chocolate instead of candy melts?
Regular chocolate can work but may not set as smoothly or harden as firmly as candy melts. Candy melts are specifically designed to create a perfect coating without tempering, making them ideal for this recipe.
What if my candy melts start to seize or thicken?
If your candy melts seize up, stir in about a teaspoon of vegetable oil and gently heat in 10-second bursts, stirring frequently. Avoid adding water, as it causes the melts to harden irreversibly.
Can I mix colors to create my own shades?
Absolutely! Use gel food coloring (not liquid) to tint white candy melts gradually—about a quarter teaspoon for every three-quarters of a cup—until you achieve your desired color.
Is it okay to dip multiple cookies at once?
It’s best to dip and decorate one cookie at a time to ensure your sprinkles stick properly and the candy coating doesn’t harden before use. This approach ensures each cookie looks fabulous.
How do I make mummy designs with piping?
Once the coating hardens, fill a piping bag fitted with a small round tip with white candy melts. Pipe thin horizontal stripes across the cookie to mimic mummy bandages, adding candy eyes last for a spooky effect.
Final Thoughts
These Easy Spooky Chocolate Covered Halloween Dipped Oreos are pure joy to make and eat—a perfect blend of simplicity, creativity, and holiday spirit. I promise once you whip up a batch, they’ll become your go-to Halloween treat to share with everyone you love. Give this recipe a try and watch how those festive colors and flavors light up your celebrations!
PrintEasy Spooky Chocolate Covered Halloween Dipped Oreos Recipe
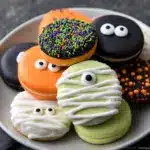
Celebrate Halloween with these easy and fun Chocolate Covered Halloween Dipped Oreos, featuring vibrant candy melts in spooky colors and decorated with festive sprinkles and candy eyes. Perfect for parties, trick-or-treat treats, or a festive dessert.
- Prep Time: 15 minutes
- Cook Time: 10 minutes
- Total Time: 1 hour 25 minutes
- Yield: 12–15 dipped Oreos 1x
- Category: Dessert
- Method: Dipping
- Cuisine: American
- Diet: Vegetarian
Ingredients
Cookies
- 1 package Halloween Oreos or any sandwich cookie
Candy Melts
- 6 oz chocolate melting wafers
- 6 oz orange candy melting wafers
- 8 oz white candy melting wafers
- 6 oz purple candy melting wafers
Decorations
- Sprinkles
- Candy eyes
Instructions
- Prepare your workspace: Line a cookie sheet with wax paper or parchment paper to create a non-stick surface for drying the dipped Oreos.
- Melt the candy wafers: In separate microwave-safe bowls, melt each color of candy wafers in 30-second increments, stirring in between, until smooth and fully melted, about 1 minute per batch.
- Dip the Oreos: Using a spoon, fully coat one Oreo at a time in the melted candy wafers or chocolate. Scoop it out with a fork, gently tapping on the bowl edge to remove excess coating.
- Decorate immediately: Place the coated Oreo onto the prepared cookie sheet and quickly add sprinkles or candy eyes before the coating begins to set, so the decorations stick well.
- Let harden: Allow the dipped Oreos to harden at room temperature for 1 hour before proceeding to decorate further if desired.
- Add detailed designs: Using a piping bag fitted with a small tip, create mummy designs or other spooky details on the hardened Oreos for a festive touch.
Notes
- Only melt up to 6 oz of candy melts at a time to avoid burning or premature thickening; even if increasing the recipe, work in smaller batches.
- Dip and decorate one cookie at a time to ensure sprinkles adhere properly.
- If candy melts begin to thicken or seize, add 1 teaspoon of vegetable oil and heat in 10-second increments while stirring; never add water as it causes seizing.
- To tint white melting wafers, use only gel food coloring — approximately ¼ teaspoon per ¾ cup of wafers, or until desired color is reached.
- Store finished cookies in an airtight container at room temperature for up to 2 weeks.
- Oreos can be frozen for up to 2 months; thaw completely before serving.
Nutrition
- Serving Size: 1 dipped Oreo
- Calories: 150
- Sugar: 18g
- Sodium: 85mg
- Fat: 8g
- Saturated Fat: 5g
- Unsaturated Fat: 2g
- Trans Fat: 0g
- Carbohydrates: 20g
- Fiber: 1g
- Protein: 1g
- Cholesterol: 5mg
Keywords: Halloween Oreos, chocolate dipped Oreos, candy melts, Halloween treats, festive cookies, easy Halloween dessert