Fun & Easy Halloween Oreo Mummy Pops Everyone Will Love Recipe
If you’re looking to whip up a spooky yet delightfully sweet treat this October, these Fun & Easy Halloween Oreo Mummy Pops Everyone Will Love are absolutely the way to go. Combining the classic crunch of Oreos with the creamy goodness of white candy coating and playful mummy decorations, these pops are as fun to make as they are to eat. Whether you’re hosting a Halloween party or just want a festive dessert to brighten the holiday, these mummy pops hit the perfect balance between adorable and delicious.
Ingredients You’ll Need
Getting started with this recipe is super straightforward because each ingredient is carefully chosen to ensure the perfect balance of taste, texture, and Halloween flair. From the creamy white candy melts to the crunchy Oreos and whimsical candy eyeballs, every piece plays an essential role.
- White Candy Melts or White Chocolate Chips: These create the smooth, creamy coating that doubles as the mummy wrap, adding sweetness and that classic white color.
- Oreos (preferably double-stuffed): The sturdy cookie base that gives you that delightful crunch and chocolate flavor underneath the coating; gluten-free options work too!
- Lollipop Sticks: Strong and slim, these hold the cookies perfectly so you can dip and decorate without mess or fuss.
- Candy Eyeballs: These playful decorations take your mummy pops from simple to spooktacular instantly, making each treat uniquely adorable.
How to Make Fun & Easy Halloween Oreo Mummy Pops Everyone Will Love
Step 1: Melt the White Candy Coating
Begin by melting your white candy melts or white chocolate chips in a microwave-safe bowl. Heat them for 30 seconds, stir, and repeat until smooth and glossy. Achieving the perfect melt is key to getting that luscious coating your mummy pops need to look irresistible.
Step 2: Prep the Oreo Pops with Lollipop Sticks
Gently twist apart the Oreos so the cream stays mostly on one side. Dip the end of a lollipop stick into the melted white chocolate, then press it into the cream center of an Oreo half. Reassemble the cookie carefully around the stick. This sticky step ensures your mummy pop stays sturdy and ready for decorating. Chill them in the refrigerator for about 10 minutes to set the stick securely.
Step 3: Dip the Oreos in the Melted Candy
Once the Oreo pops are chilled and set, dip each one into the melted white candy until fully coated. Hold the pop above the bowl for a few seconds to let any excess coating drip away—this helps create an even, smooth surface perfect for adding your mummy details.
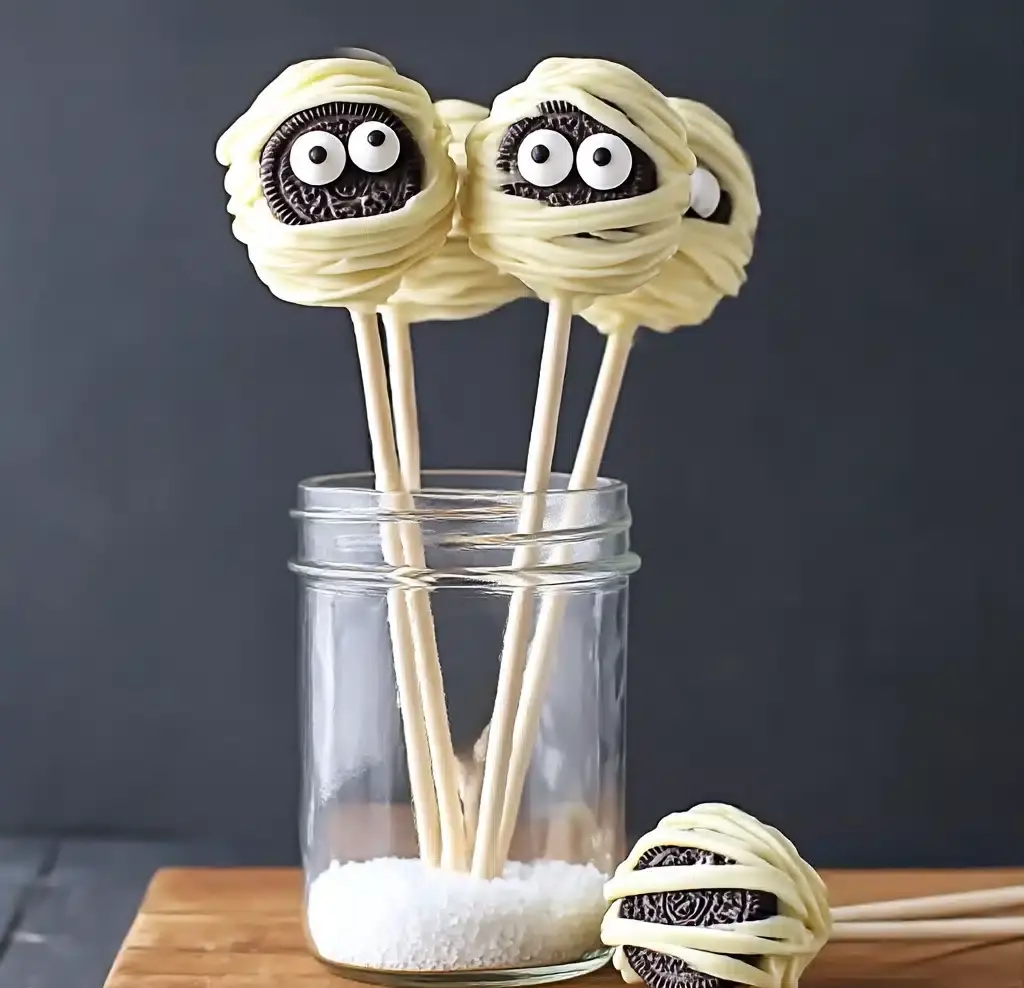
Step 4: Decorate with Candy Eyeballs and Piped Bandages
While the coating is still wet, gently press two candy eyeballs onto what will become your mummy’s face area. Next, use a piping bag or a zip-top bag with a tiny corner snipped off to drizzle thin, irregular lines of melted candy over the cookie. These lines mimic the wrapped bandages of a spooky mummy. Don’t worry about precision here — the beauty is in the messy, crafty look!
Step 5: Chill and Set Completely
Place your decorated mummy pops back into the refrigerator for 15 to 20 minutes. This final chill time lets the candy coating harden fully so your pops are not only photo-ready but easy to handle and enjoy.
How to Serve Fun & Easy Halloween Oreo Mummy Pops Everyone Will Love
Garnishes
For an extra festive touch, sprinkle some edible glitter or colored sugar on the pops right after piping the bandages. You can also add tiny orange or black sprinkles along the “bandages” for that additional Halloween pop of color. These little flourishes can turn simple mummy pops into the centerpiece of your dessert table.
Side Dishes
Serve your mummy pops alongside other Halloween goodies like pumpkin-shaped sugar cookies, caramel apples, or even a bowl of popcorn tossed with spooky-colored candy pieces. The pops’ rich sweetness pairs beautifully with crunchier or fruitier sides for a well-rounded festive snack spread.
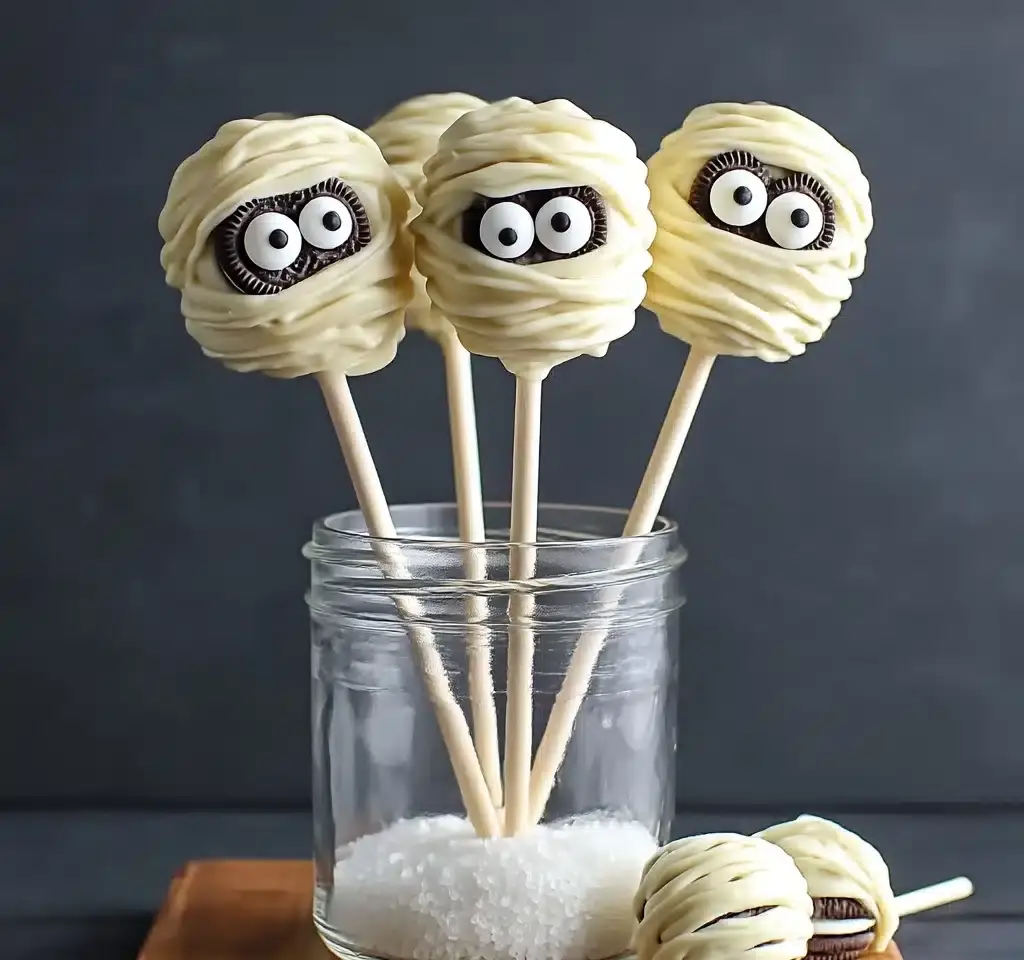
Creative Ways to Present
Stick your mummy pops upright in a block of decorated floral foam covered in orange or black tissue paper to create a “mummy bouquet” centerpiece. Alternatively, arrange them standing inside a carved pumpkin or on a cake stand surrounded by miniature pumpkins and fake spider webs — talk about a showstopper that guests will remember!
Make Ahead and Storage
Storing Leftovers
If you have leftover mummy pops, keep them fresh by storing in an airtight container at room temperature, away from heat and direct sunlight. They hold nicely for up to 2 days without losing their crisp coating or adorable appearance.
Freezing
You can freeze these mummy pops to enjoy later by wrapping each one individually in plastic wrap and placing them in a zip-top freezer bag. When ready to eat, just thaw at room temperature for about 30 minutes. The texture stays wonderful and the decorations remain intact.
Reheating
There’s no need to reheat mummy pops since they are best served cool and the coatings can soften if warmed. If you prefer, simply leave them out for a few minutes to take the chill off before serving.
FAQs
Can I use regular Oreos or do they have to be double-stuffed?
Regular Oreos work just fine, but double-stuffed cookies add an extra creamy center that helps secure the lollipop stick and balance the candy coating’s sweetness perfectly.
What if I don’t have candy eyeballs?
No worries! You can create eyes with small dots of dark chocolate or icing. Just pipe two little circles to get that classic mummy look in a pinch.
Can these mummy pops be made gluten-free?
Absolutely! Use gluten-free Oreos to keep the treat safe for gluten-sensitive friends or family while still enjoying all the fun and flavor.
Is it necessary to use white candy melts?
White candy melts or white chocolate work best for that mummy bandage effect, but you could also experiment with colored melts if you want a different twist on tradition.
How long do these mummy pops last after making?
Stored properly, they stay fresh for up to 2 days at room temperature or up to 5 days in the refrigerator, making them great for preparing ahead of your Halloween celebrations.
Final Thoughts
These Fun & Easy Halloween Oreo Mummy Pops Everyone Will Love are guaranteed to bring smiles and spooky delight to your festivities. Light on prep time but big on charm and flavor, they’re perfect for kids, parties, or just indulging your sweet tooth with a festive twist. I can’t wait for you to try making these yourself — trust me, once you get started, these mummy pops will become your go-to Halloween treat year after year.
PrintFun & Easy Halloween Oreo Mummy Pops Everyone Will Love Recipe

These Fun & Easy Halloween Oreo Mummy Pops are a spooky and delicious treat perfect for Halloween parties. Coated in creamy white chocolate and adorned with candy eyeballs and chocolate bandages, these mummy pops are as charming as they are tasty. Gluten-free options available, these pops are simple to make and sure to delight kids and adults alike.
- Prep Time: 15 minutes
- Cook Time: 10 minutes
- Total Time: 25 minutes
- Yield: 12 mummy pops 1x
- Category: Dessert, Snack
- Method: No-Bake, Dipping
- Cuisine: American
- Diet: Vegetarian
Ingredients
For the Coating
- 1 cup White Candy Melts or White Chocolate Chips
For the Base
- 12 count Oreos (preferably double-stuffed, gluten-free if needed)
For Assembly
- 12 count Lollipop Sticks
For Decoration
- 1 cup Candy Eyeballs
Instructions
- Melt the White Chocolate: In a microwave-safe bowl, melt the white candy melts or white chocolate chips according to package instructions, stirring every 30 seconds until smooth and free of lumps.
- Attach Lollipop Sticks to Oreos: Carefully twist apart each Oreo. Dip one end of a lollipop stick into the melted chocolate and press it into the creamy center of one Oreo half. Reassemble the cookie, sandwiching the stick in the center, and place the Oreo pops in the refrigerator for about 10 minutes to set firmly.
- Coat Oreo Pops: Dip each assembled Oreo pop fully into the melted white chocolate ensuring an even coverage. Hold the pop over the bowl to allow excess chocolate to drip off for a smooth finish.
- Add Candy Eyeballs: Before the coating sets, gently press candy eyeballs onto the white chocolate-covered Oreo to create the mummy’s face.
- Pipe Mummy Bandages: Using a piping bag or zip-top bag filled with a small amount of the melted chocolate, pipe thin strips over and around the Oreo pop to mimic mummy bandages.
- Final Set: Place the decorated pops back into the refrigerator for 15-20 minutes to allow the chocolate to harden completely before serving.
Notes
- Store mummy pops in an airtight container at room temperature for up to 2 days or refrigerate for up to 5 days.
- Use gluten-free Oreos to make this recipe suitable for gluten-sensitive guests.
- For best results, use sturdy lollipop sticks to support the weight of the Oreo.
- Allow chocolate to slightly cool but not fully harden before applying candy eyeballs and piping to ensure they stick properly.
- These pops can be made a day ahead and kept refrigerated until serving.
Nutrition
- Serving Size: 1 pop
- Calories: 120 kcal
- Sugar: 10 g
- Sodium: 80 mg
- Fat: 6 g
- Saturated Fat: 3 g
- Unsaturated Fat: 3 g
- Trans Fat: 0 g
- Carbohydrates: 18 g
- Fiber: 1 g
- Protein: 1 g
- Cholesterol: 0 mg
Keywords: Halloween treats, Oreo pops, mummy pops, candy melts, no bake dessert, easy Halloween dessert