Boston Cream Pie Cookie Bites That Will Wow Your Taste Buds Recipe
Introduction
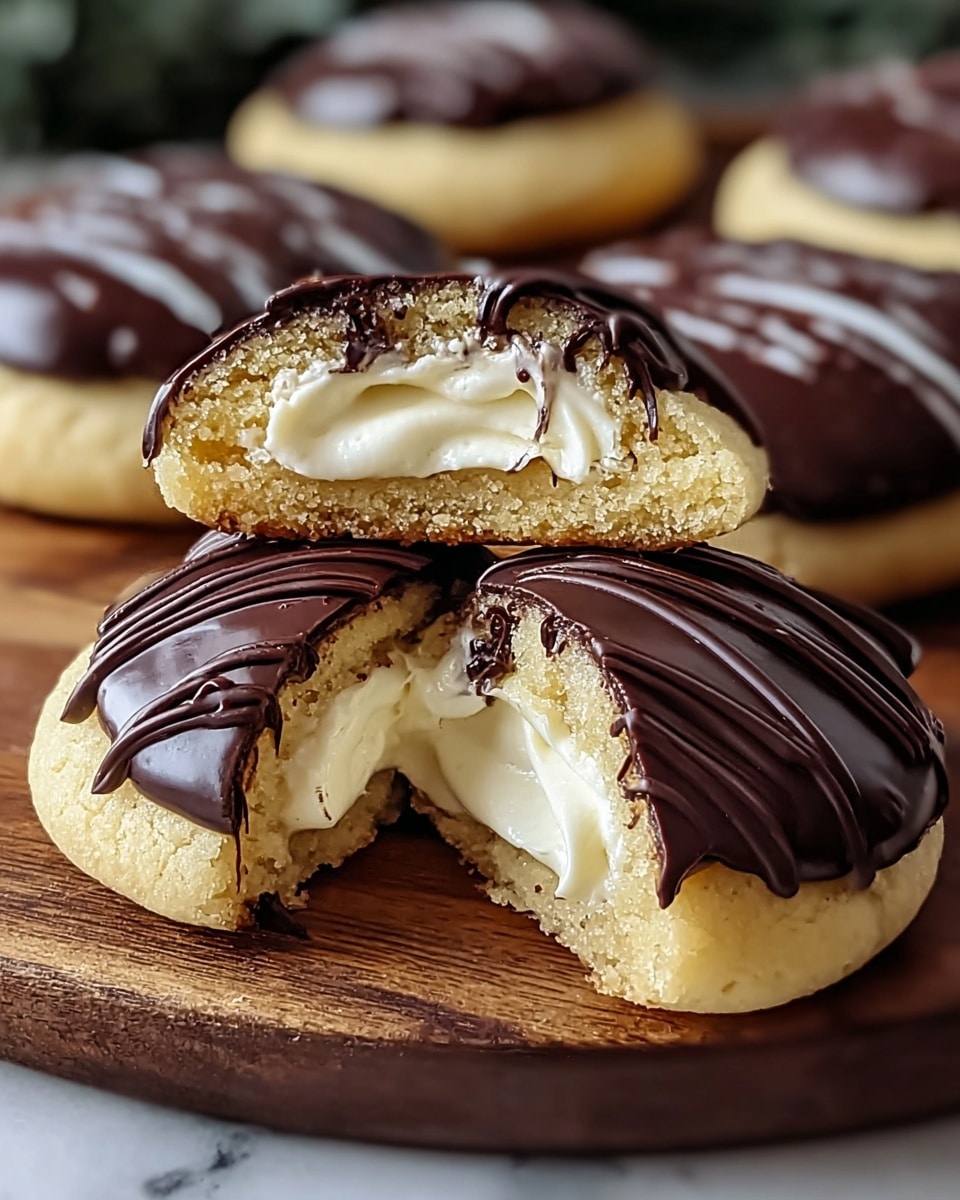
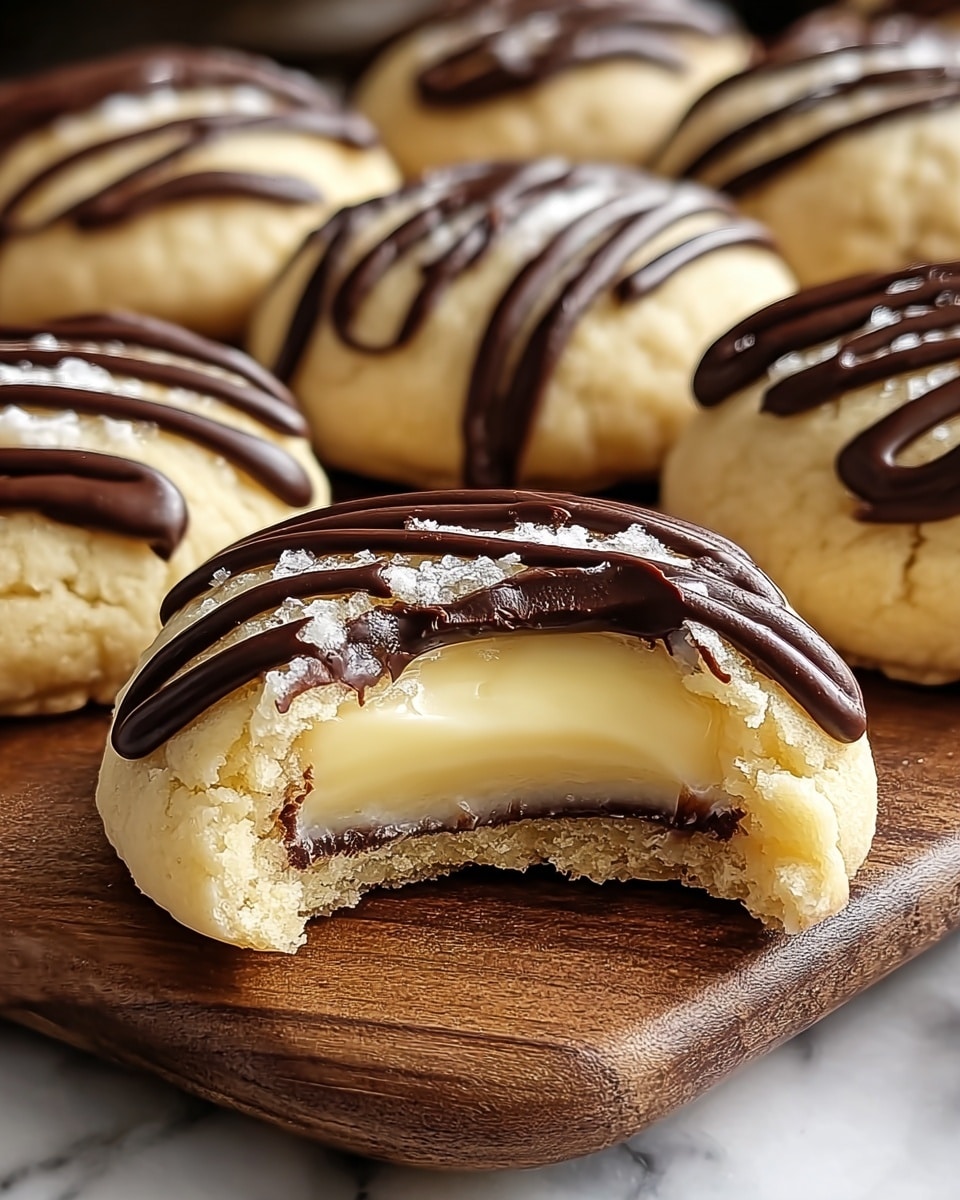
These Boston Cream Pie Cookie Bites are a delightful twist on the classic dessert, combining a soft cookie base with creamy custard and a rich chocolate drizzle. Perfect for impressing your guests or treating yourself to a fancy snack.
Ingredients
- 2 cups All-Purpose Flour (substitute with whole wheat flour if desired)
- 1 teaspoon Baking Powder (ensure it’s fresh for best results)
- 1/2 teaspoon Baking Soda (enhances the leavening effect)
- 1/4 teaspoon Salt (use sparingly to balance sweetness)
- 1/2 cup Unsalted Butter (contributes to the soft texture)
- 3/4 cup Granulated Sugar (consider brown sugar for a deeper flavor)
- 1 large Egg (acts as a binder and moisture source)
- 1 teaspoon Vanilla Extract (almond extract can be a delightful alternative)
- 1 cup Vanilla Custard (use store-bought or homemade)
- 1 cup Semi-Sweet Chocolate Chips (feel free to swap in dark chocolate)
- 2 tablespoons Vegetable Oil (coconut oil is a good substitute)
Instructions
- Step 1: Preheat your oven to 350°F (175°C) and line a baking sheet with parchment paper.
- Step 2: In a medium bowl, whisk together the flour, baking powder, baking soda, and salt until combined.
- Step 3: Cream together the softened butter and sugar until light and fluffy, about 2-3 minutes.
- Step 4: Add in the egg and vanilla extract, beating until well combined.
- Step 5: Gradually fold the dry mixture into the wet ingredients until just integrated.
- Step 6: Scoop the dough onto the prepared baking sheet, leaving space between each scoop.
- Step 7: Bake for 10-12 minutes or until the edges are lightly golden. Cool on a wire rack.
- Step 8: Press an indentation into the center of each cookie.
- Step 9: Fill the indents with custard using a piping bag or small spoon.
- Step 10: Melt the chocolate chips with vegetable oil and drizzle over the filled cookies.
- Step 11: Allow the chocolate to set for about 10-15 minutes before serving.
Tips & Variations
- Cool cookies completely before adding custard to maintain a firm texture and prevent melting.
- Use fresh baking powder and baking soda for the best rise and texture.
- Try substituting vanilla extract with almond extract for a different but delightful flavor twist.
- For a richer chocolate flavor, use dark chocolate chips instead of semi-sweet.
- Make your own custard at home to control sweetness and creaminess, or use a quality store-bought version for convenience.
Storage
Store the filled cookie bites in an airtight container in the refrigerator for up to 3 days. To enjoy, bring them to room temperature or warm slightly if desired. Avoid freezing, as the custard filling may separate upon thawing.
How to Serve
Serve this delicious recipe with your favorite sides.
FAQs
Can I make the cookie base ahead of time?
Yes, you can bake the cookies a day ahead and store them in an airtight container. Add the custard filling and chocolate drizzle just before serving for the best texture.
What can I use if I don’t have a piping bag for the custard?
If you don’t have a piping bag, you can use a small spoon to carefully fill the cookie indents with custard. Alternatively, a resealable plastic bag with a small corner cut off works well as a makeshift piping bag.
PrintBoston Cream Pie Cookie Bites That Will Wow Your Taste Buds Recipe

Delight in these Boston Cream Pie Cookie Bites—a perfect fusion of soft cookie base filled with creamy vanilla custard and topped with a rich chocolate drizzle. These bite-sized treats offer an elegant twist on the classic Boston Cream Pie, delivering layers of flavor and texture that will impress at any gathering or satisfy your sweet cravings at home.
- Prep Time: 15 minutes
- Cook Time: 12 minutes
- Total Time: 37 minutes
- Yield: 24 cookie bites 1x
- Category: Dessert
- Method: Baking
- Cuisine: American
Ingredients
For the Cookie Base
- 2 cups All-Purpose Flour (substitute with whole wheat flour if desired)
- 1 teaspoon Baking Powder (ensure it’s fresh for best results)
- 1/2 teaspoon Baking Soda (enhances the leavening effect)
- 1/4 teaspoon Salt (use sparingly to balance sweetness)
- 1/2 cup Unsalted Butter (contributes to the soft texture)
- 3/4 cup Granulated Sugar (consider brown sugar for a deeper flavor)
- 1 large Egg (acts as a binder and moisture source)
- 1 teaspoon Vanilla Extract (almond extract can be a delightful alternative)
For the Custard Filling
- 1 cup Vanilla Custard (store-bought or homemade)
For the Chocolate Drizzle
- 1 cup Semi-Sweet Chocolate Chips (feel free to swap in dark chocolate)
- 2 tablespoons Vegetable Oil (coconut oil is a good substitute)
Instructions
- Preheat Oven: Preheat your oven to 350°F (175°C) and line a baking sheet with parchment paper to prevent sticking and ensure even baking.
- Mix Dry Ingredients: In a medium bowl, whisk together the all-purpose flour, baking powder, baking soda, and salt until well combined, creating an even base for the cookie dough.
- Cream Butter and Sugar: In a separate bowl, cream the softened unsalted butter with granulated sugar until the mixture becomes light and fluffy, about 2-3 minutes, which helps develop the cookie’s texture.
- Add Egg and Vanilla: Beat in the egg and vanilla extract until fully incorporated, adding moisture and flavor to the dough.
- Combine Ingredients: Gradually fold the dry ingredients into the wet mixture until just combined, being careful not to overmix to keep the cookies tender.
- Portion Dough: Scoop the dough onto the prepared baking sheet, spacing scoops evenly to allow for spreading during baking.
- Bake Cookies: Bake in the preheated oven for 10-12 minutes or until the cookie edges are lightly golden, then cool them on a wire rack completely.
- Create Indentations: Once cooled, gently press an indentation into the center of each cookie to prepare for the custard filling.
- Fill with Custard: Using a piping bag or small spoon, fill each indentation with the vanilla custard, adding the signature creamy layer.
- Prepare Chocolate Drizzle: Melt the semi-sweet chocolate chips with vegetable oil until smooth, ensuring a glossy finish for drizzling.
- Drizzle Chocolate: Drizzle the melted chocolate over the custard-filled cookies evenly.
- Set Chocolate: Allow the chocolate to set at room temperature for 10-15 minutes before serving to achieve a perfect bite.
Notes
- Allow cookies to cool completely before adding the custard to maintain the desired texture and prevent melting.
- Use fresh baking powder and baking soda to ensure optimal rise and texture.
- Substitute brown sugar for granulated sugar to add a richer, caramel flavor.
- Almond extract can be used instead of vanilla extract for a different flavor profile.
- For a dairy-free option, use plant-based butter and custard alternatives.
Keywords: Boston Cream Pie, cookie bites, custard-filled cookies, chocolate drizzle, dessert, baked cookies